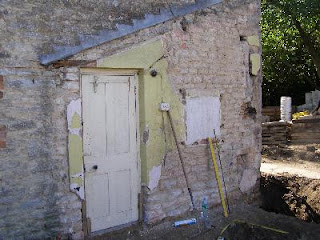
Sunday 16 December 2012

Reflections on the Last Two Years

Now that I have a bit more time for activities other than building work, I've been thinking about what has been acheived in the last two years and two months.  Specifically, I've been thinking about two aspects of the work, namely the things I've done which have really pleased me, and the things that I would rather had been done differently.

Under the latter heading come a few things which still bug me:
  • The attitude of the Conservation Officer - this relationship seemed to have gone wrong near the start, but I still don't really know why, other than because (just possibly) the CO really IS an unhelpful person.
  • The fact that Highways at the County Council told me that I could not widen the existing gateway to make a single driveway entrance for both houses as it was too close to a junction, but then (after I had made an entrance in the old wall) they allowed my new neighbour to make a new entrance even closer to the junction!
  • A newly laid slate has slipped from the roof to the gutter, but the roofer has yet to come and fix it.
  • The new kitchen sash window is four over four, not two over two as the rest of the windows.
  • There is still no vent to the kitchen...
  • Thames Water fitted an external meter in the pavement and this has been found to be a joint supply. Now we have to get an internal meter fitted, but that would have been so much easier if done before the new kitchen was fitted, as I intended.
  • My new loft hatch is not quite square, because the joists were not parallel!
  • The new extension is not exactly as intended - the roof is higher, the chimney lower and the plasterer gave me incorrect answers to two clear questions, with the result that the internal work I did is not perfect; one window cill has thicker render than he said, so it's almost level with the top of the lower window frame, and a plastered stud wall is thinner than the rendered blocks that it rests on.
Looking at the good side, there are lots of things which make me smile:
  • The stone wall where I filled in the bottom of the old doorway
  • The wall which I lime-plastered myself (the stone wall which is the join between the old house and new-build extension)
  • The new 6' stone wall beside the front door, and the attached gates
  • The new sash window which cost just £95 from a reclamation yard
  • The front room floor where I replaced bits of joists and re-laid most of the boards plus some reclaimed ones
  • The stud wardrobe frontage which I built for the master bedroom
  • The wood-burning stove in the kitchen, in the alcove which I "found" by removing the old tiled fireplace
  • The recently fitted secondary glazing (we are cosy, and it is quieter now)
  • The limecrete/black limestone floor in the kitchen (laid by Chris, Shane and me)
  • The black limestone floor in the new extension which I laid entirely by myself (on concrete...)
  • The extension roof on which I laid over half the slates in just over a day on my own, much to Chris's surprise
  • The casement window in the new extension which I salvaged from the old extension and did a major repair job
  • The 1800+ Imperial bricks from the old extension which Jane and I salvaged and were re-used in the new extension (I only had to buy about 200 more)
  • All the other little bits and pieces from the old building which I laboriously removed, kept and re-used
  • Buying my own mixer, instead of hiring one
  • Deciding that I would manage the entire process myself, instead of paying a builder to project manage it
Actually, the whole place makes me smile - it just feels so safe, solid and secure, just as a home should feel.

Tuesday 20 November 2012

Secondary Glazing

I mentioned before how the Conservation Officer (erroneously in most people's view) sweepingly declared that "you can't have double glazing in a listed building".  That was in relation to a brand new sash window (far right below) which replaced a metal Crittal door and two windows on the side of the house (near right below), which seemed an inexplicable decision; I made sure that the design of the window will allow for double glazing if I so choose in the future, and the CO never realized!  I should point out that I agree that, in a building like this, one should not remove old sash windows and fit uPVC ones as they always look wrong - the thickness of the glazing bars is a real give away apart from the lack of wavy glass - but I did think that DG in a new window would be allowed. Anyway, with that history, I was never going to bother to mention the subject again to the CO, and so the house has remained draughty with a corresponding high gas bill last winter. As a result, I turned my thoughts to secondary glazing, and recently this came to the top of my list of "Things to do before winter". 

Secondary glazing is acceptable on period properties without conservation consent as it a reversible change (other than a few screw holes), and also it is not like double glazing, in that the space between the two panes is not sealed so it does not provide the same barrier to heat loss.  Basically it does reduce heat loss to an extent, but it also reduces draughts and noise.  The sash windows in this house are ideal for secondary glazing as the frame of the sash provides a good flat surface for the inner sheet.  You can get complicated systems which, for instance, add sliding glass in a frame, but I chose a simpler system which comprises a sheet of acrylic with a soft plastic edging strip, held against the sash window by little nylon clips and screws. I'm sure there are other suppliers, but I bought all my stuff from Tubeway Easyfix (http://www.tubeway.co.uk/).  They were kind enough to send me, free of charge, a plastic mitre block for cutting the plastic edging, which got omitted from my order.  Since this item retails at £7.05 + VAT, I'm glad I didn't pay for it; you would think they would always throw such a little bit of plastic in for nothing.

There are relatively few issues with this system, although the price of the acrylic sheet surprised me; I used 2mm thick sheet, although you can use 3mm or 4mm (even more expensive!).  One issue seems to be the size of the sheets; most of my windows are 90cm wide, and so need acrylic sheet which is about 95cm wide; of course, one of the standard widths is 92cm so I had to go to the next size up, with consequent additional waste and cost.  One potential difficulty is cutting the acrylic; I was told that could probably score the acrylic and break it like glass, but even with 2mm thick, this just did not work reliably.  Hence it had to be cut and I quickly proved that you cannot use a hand saw as this causes cracks along with a very rough edge. However my jigsaw with a fine blade proved to be the business so long as you don't move it too quickly, but even then you need to support the edge at the point of cutting or you get a jagged edge with cracks.  Straight edges help with positioning the clips, so I always made sure I had an edge cut by the supplier along the bottom when I fitted the first clips.

I've now done five windows, including the large one in the main bedroom.  This one was so large that I was unable to buy a sheet of acrylic big enough, so I have made a wooden horizontal support which runs across in line with the join in the sashes, so that it isn't seen from outside.
This support was made from four bits of stripwood, and there is a groove top and bottom to hold the edges of the acrylic; the strength is primarily from an expensive piece of hardwood (30mm x 10mm) which forms the visible side in the room. Photos of the system are quite difficult to do, as all they show are the windows and you can hardly see the edge of the acrylic, which is the whole point really.  However, here's a detail picture so you can see the edging and the clips:

The draughts have largely gone and the difference in room temperature is quite noticeable; it really does make a difference and there is now less need to keep all internal doors closed.  I've still got to do one in the hall, one in the extension and a pair in the bathroom (left); the bathroom ones fell to the end of the list due to the refurbishment work needed on the window frame and the fact that I will have to re-fit the venetian blind on another bit of stripwood to hold it away from the acrylic. The main renovation of all these windows will get done next summer (if we have one) and the main aim will be to keep the old glass wherever possible.

Having eliminated a lot of draughts, I will have to make sure that the house is still well ventilated - there has been no dampness or condensation anywhere in the last year since it dried out, apart from what we caused with cooking and showers.

Thursday 1 November 2012

A 100th Celebration

No, I'm not that old although I do sometimes feel it.

The celebration is because the Blogger editor tells me that this my 100th post since I started this blog twenty seven months ago. Having a back-up on Word, the word count tells me that it now comprises almost 62,000 words, which is probably a whole book, I suppose.  The blog has been quite useful for myself when I have forgotten how, when or why I did some particular thing, and it has also encouraged me to take a couple of thousand pictures of the work as it progressed.  Mind you, there are still some things of which I have managed to fail to take pictures; this surprises me as I seem to have the camera close to hand most days.

Some unexpected good weather this week has allowed me to lay some more concrete near the back gate and to start finishing the low wall in the front which leads up to the new wall.  I'm still putting off the inside jobs until the weather is too bad to work outdoors at all.

Finishing the concrete at the back gate was a relief; I had already purchased a monkey tail bolt (right) - the sort with a long handle to operate it, as these are often used at the top and bottom of large doors and gates.  Since I wanted the half-inch square bolt to locate in the concrete, I had to leave that bit of concreting until after I had fitted the gate and the bolt, so that I could set the bolt in its receptacle in the ground and concrete around the receptacle (a bit of square tube, just visible in the photo); even so, the bolt needed modifying as I wanted a greater travel than any bolt I found, since I wasn't sure about how close to the ground I would get the bottom of my gate.  This modification was easy once I had found some rivets to allow me to drill out the existing and move the retaining bracket up a bit.  In the event, the gate is satisfyingly low (ref cats, comment below) and I could have moved the bracket a bit less.

I treated myself in a shop recently and bought a blacksmith-made Suffolk latch (photo left) for these gates.  You know, the sort of one where you operate a lever on one side with your thumb above the handle, and it lifts the latch inside.  I have to say, at £35 it was quite expensive compared to mass-produced stuff from W and HB, but they cannot even get close to the quality and feel of something properly made like this.  (Yes, I need to restore the paint finish...)

The gates need to be secure so there are two other horizontal bolts plus a support strut which goes to the new gate pillar; of course, when secured the Suffolk latch will not open the gates from outside, but other than some ugly padlock I could not see how I could secure and open the gates from both sides.  In fact, what I really wanted to secure the gates with was one of those bits of 4 by 2 which fits into brackets on either side - like an old fortress gate.  I would have wanted to use oak (which is obtainable) but I couldn't find any nice sturdy brackets anywhere; brackets made out of wood would be a bit too chunky for the size of these gates.  Anyway, the gates are now pretty secure and, to my delight, they keep the local cats out; one of these is a huge, insolent black moggy and another is pure white.  They seem to have used the garden as their own pathway from front to back for years, stopping for a bird meal somewhere if they got lucky.

I also want to put a strip of wood down the front edge of the right hand gate as a stop for the left hand one; I found a long strip of half inch seasoned old pine removed from somewhere, but I can't recall exactly where.  As I've said before, keeping something which "looks useful" for a year or eighteen months on the off-chance, and then finding a use for it is very satisfying as well as economic (I once used a car light bulb which I had bought 17 years previously for an earlier car!)  Strip, sand, cut to length, fill, sand, prime, undercoat, top coat and then I can fit it.  Then there's just a drip strip along the top of both gates and a quick touch up of the paint, and they will be done.

There's then just the small job of painting the left hand gate black.  This is not so easy as the paint is some incredibly hard modern stuff on which all known sandpaper seems to have no discernible effect.  I did the road side a long time ago using my sander plus a good number of sheets of aluminium oxide paper, so I guess it will be the same again, but largely by hand this time thanks to the ledges and braces.  You can see why I am leaving that task for later!

Saturday 27 October 2012

Woolly Loft Insulation

Having completed the wall last week (at last), I found myself curiously relaxed this week.  When the weather is OK I will finish the gates, but they are secure and useable for now, so what to do?  Then I remembered my list (from August) of the tasks that I wanted to do before winter.  Most of these were left from last winter as the extension and the wall have managed to fill most of my time, as well as using most of my energy.  I am painfully aware that jobs like finishing the bathroom and the bedroom wardrobe have literally not been touched since we moved in (July 2011); happily, 'er indoors has been most patient but I'm aware that I can't rely on that indefinitely.

Looking at the weather forecast, it was easy to decide that the loft insulation was top of the list.  A long time ago I opted for a "cold roof" which means laying the insulation onto the joists and ensuring that the loft space above is well ventilated; I bought lots of "Thermafleece PB20" almost TWO YEARS AGO with the intention of laying it as soon as possible after we had plastered the ceilings.  However, things often don't work out as you expect, do they?  This stuff isn't cheap but it is far preferable to fit something like this in an old building because it's breathable, whereas that modern stuff actually prevents the passage of water vapour and it never dries out if it gets soggy. I managed to do about two-thirds of the loft before the onset of winter last year, but left the difficult bit around the hatch until last.  Now it was time to tackle this.

"Thermafleece PB20" is actually 60% British sheeps' wool and 40% recycled polyester which gives it body.  It is much nicer to handle than man-made stuff as it doesn't irritate your skin.  However, I found on the first two occasions I used it that it can irritate your throat (or perhaps that was the dust in the loft); I developed a cough in the following week each time and so I then decided to always use a face mask - this has worked!

It is however more difficult to cut than other modern stuff, and you can't tear it easily.  It comes in compressed rolls and I realized that it was far preferable to try to cut it whilst still compressed.  I used an 8" carving knife for the cutting, with frequent pauses to re-sharpen it on a steel.  I either cut it on the roll by piercing the roll radially many times with the knife and then hacking at the remaining bits, or else by laying it on a board and slicing it whilst also trying to keep it compressed.  Both these were nevertheless somewhat trying procedures, as well as being tiring on your arms.  Annoyingly I found an easier way this week, only about an hour before I finished. I found this by accident as I was cutting off the end a piece which was going to fit up to a joist; I laid it over the joist and put another piece of wood under the insulation so that I was cutting between the pieces of wood.  For some reason cutting down and through the fleece was very easy and effective.  What was a two minute job became a ten second one!

I have laid three layers: a 70mm layer between the joists, and two 100mm layers over the top.  Indeed, this seems a bit "over the top" but the levels of insulation recommended have increased since the days of a simple three inch layer of horrible fibreglass stuff.  The thickness of the top layer can be seen in the photo on the left. Note that in all these photos there is a good gap between the end of the insulation and the roof itself, as ventilation is important (contrary to those who would like us to live in sealed boxes!).

I had a spot of bother when doing this job in 2011 as I wanted to board the area under the roof light.  Unfortunately this was near the central internal wall and the joists on the front of the house were larger than those on the back, so you can imagine the issues I had with relative heights of joists, insulation and board.  That was when I ran out of time and energy over a year ago, but this time I persevered and have succeeded.

The last job I had to do was to fit the loft hatch and add some insulation on that as well, as it was probably a major source of draughts last year.  Hopefully the expense of this stuff will be borne out by the improvement in the warmth of the house and a reduction in heating bills over the duration of our retirement.  You can but hope!

Thursday 18 October 2012

O Wall! O Sweet, O Lovely Wall!

The wall is complete! (Apart from a few details... )

Many people better educated than myself might recognise the above quote from "A Midsummer Night's Dream".  You might think that this would be the most appropriate quotation for me (despite my failure in English Literature 'O' Level!), as I savour my hard-won success.  However, given the way I feel right now, a rather more appropriate quotation is found just a few lines further on in the same opus: "O Wall! Full often hast thou heard my moans"!

I sit here feeling very tired after a long and hectic day's work.  I had finished off the stone structure on Tuesday and today was the icing on the cake, or rather the copers on the wall. I'm quite surprised that I have built most of the structure using stone that was already at the property; all I needed to acquire was the faced stone (including the pintle blocks for the gate hinges) which forms the quoin.  I was pleased that it was pretty level for the coping stones to be laid, and also when I made a small framework to lie on the top I proved that it was pretty well parallel as well.  I used this to draw a line showing the width of the coping stones and, hence, where I needed to grind an angle on the (few) protruding bits.  There is a bend in the wall - I didn't want to make this too easy for myself! - and of course I had forgotten about the coping stones when I designed the bend.  This bend was required because I didn't want to uproot the ivy climbing up the boundary wall, which would have been necessary if the new wall had been straight.  Another difficulty was that the soil rises in the direction of the boundary wall, so the foundations required a lot of thought.

Today I hired an angle grinder again [Top Tip: buy your own blade if you think you'll hire one more than once] and spent the morning cutting and grinding in preparation for the afternoon when my son arrived (with grandson) to help with the difficult bit - lifting the copers carefully into position on their mortar bed.  Since the heaviest weighs about 45kg, you can imagine that I had quickly decided that this was too much for me. I made a mix of NHL (sharp sand: building sand: NHL3.5 in 5:1:2 ratio).  This is basically standard 3:1 but I added the local building sand which gives a good colour match to the house pointing.  My grandson loved the mixer but was otherwise confined indoors as I had to wield the grinder again to make the last coping stones fit. 

However, in my haste I made too much mortar and so after my son left I spent the next three hours doing pointing and minor repairs to use it up; I gave up when it started to rain as dusk was falling.

I'm pretty pleased with the result.  A lot of thought has gone into this wall; I find that things usually turn out better if you think long and hard before you start, and try to imagine exactly how things will be done and what problems might ensue.  (There have also been a few sleepless nights.)  My vision was to build a security wall which would look as though it had been there for years, and I'd like to think that I have succeeded.  However, I'm glad I'm not doing that for a living - I started in May and thought it would be done by early July!


Friday 28 September 2012

Feeling Old

So is this the feeling of getting old?  Creaking joints, tired muscles, strained ligaments and that internal voice which keeps asking "should I be doing this at my age?", not to mention a general lack of energy and motivation.  I've always known and recognised my physical limits (not to mention legal and financial!), but suddenly there are many new ones coming into play; it's as though there is a Sgt Wilson inside me saying "Sir, are you sure that's wise?".  Drat, he's often correct.

I've done a fair bit on the front wall since last week despite the weather; but I've come to a stop due to simple tiredness.  Those at a similar age will perhaps recognise the signs of not sleeping particularly well or, if you do sleep well, still feeling tired the next day.  I tend to sleep well for a period which might be five or six hours if I'm lucky, but could be just two or three if some drunken berk wakes me up; thereafter, getting back to sleep may be difficult.  [Our house seems to be on one of the few ways that connect two parts of the town, and there are some (I'm sure it's the same people) who seem to love shouting in friendly terms at each other as they wander back home at 1am, 2am or even 3.30am.  Since the house is Grade II listed, I cannot fit double glazing to the bedroom windows but I do have secondary glazing on my immediate to-do list.]

Last week I enlisted the help of my son to lay a large flagstone on top of the wall, to be under the end piece of coping stone.  I could just manhandle this piece of stone on the ground but he picked it up on his own (with some effort, I think) and it was a joint job to get it to the top safely.  It went on surprisingly easily as for once all my measurements were correct, the cutting of the stone was spot on and also the mortar bed was perfect first time.  This was needed as the 14" coping stones are all narrower than the wall at the gate end, and so the flagstone also has bevelled edges to help with rainwater flow.  The 18" width of the wall at the gate end was governed by the size of the two 24" x 18" x 6" pintle stones which I purchased last year, and there was no way that I was going to cut them!  I have carefully made the rest of the wall narrower so only the end two feet needed this treatment.

Yesterday I did a lot of work on the wall, including lifting the first coping stone in place six feet up onto the bevelled flagstone (photo coming [Edit: I'm not posting the photo as the wall looks quite silly with just the one piece of coping stone! It's all out of proportion]), so I'm getting there. However, the coping stone was heavier than I realised and I could have done with the assistance of my son again.  The weight was bad enough - it must be about 35-40kg which itself made my knees creak - but then positioning it on the wall was quite difficult due to the shape; I could easily have damaged my back as I leant forward with it but chose instead to rest it on the mortar bed which then had to be re-spread.  Hence, last night I was particularly tired and slept through over eight hours without stirring (a rare occurrence) until woken by t'other half putting the radio on. This morning I can hardly get going at all, and there is no way that I will do more than potter around doing bits of small jobs.

After laying the first coping stone on top of the wall, one old song from The Jungle Book keeps coming into my mind - Kenny Ball singing "I'm the King of the Swingers".  This contains the memorable line "I've reached the top and had to stop and that's what's bothering me."  Unlike him, it's not bothering me and I shall be delighted when it's all done!

[Edit: I'm advised that actually Kenny Ball's version of "I'm the King of the Swingers" was a cover, following the film.]


Monday 17 September 2012

Stone Walls Do Not A Prison Make...

...but it certainly feels that I am trapped by the need to at least get the front side wall and back gate done before winter sets in.  There has been progress on the walls and so an update is merited.  

The front wall is almost there.  I really want to get this done to full height finished with coping stone and pointing before I remove the horrible fence panels.  These are what everyone sees when walking by, and I don't want to draw attention to my wall by being seen to be working on it for so long.  I just want to unveil it and see how many people notice it.  My hope is that relatively few will actually notice it as the plan is for it to look as though it's been there for ages.

On the left is the view from the house side (obviously I can't take a picture from the street side as the fence panels are in the way).  There is only the coping stone to add at the left hand end.  Try counting the number of stones in this wall, and then think about how long it has taken me, given that on a good day I might select and lay just ten stones in four hours if I'm going well.  Then I'm shattered and can't do any more for a couple of days...

Also visible in the picture above are the hinges for the right hand gate, plus three bits of batten to make a frame.  This was done to prove that the pintles were in line, and to allow me to position the hinges on the uninstalled gate with reference to the other gate.  (NB The vertical battens are not parallel as the holes in the hinges are not identically spaced, which surprised me.) When the gate is fitted I shall only have to sort out its locking and latching and then I shall have some security for the first time.  It will also keep the various neighbourhood cats out; they seem to still regard this place as their hunting ground, but we like looking at the variety of birds!

The retaining wall (of the "upper terrace"!) has been extended and so now runs from the back wall alongside the house, past the extension and as far as the kitchen - that's about 12 yards.  I've been using the damaged Imperial bricks in this - why use good ones?  Here's a current photo showing the end of the wall and the steps up the earth bank (with the top step which has been added since the last post):

This photo clearly shows the difference in ground levels since I decided to make sure that rising ground would never again cause dampness here.  The house is just six feet from the bottom of the steps and the original ground level at the base of the house was just above the level of the bottom concrete step.  The temporary wooden board at the bottom of the steps is about 2cm below the final new ground level.

I cannot do the stone facing for this wall yet as that job will use up the remaining stone when everything else is done.  When other walls are done, I will choose enough decent bits to cover the brick and facing stone along the top of this one, and only then will I be able to do the face with small bits.  Obviously I don't want to break up larger stone yet as I need a good choice for the other jobs.


Sunday 26 August 2012

A Step up in the Garden

Just for a change from walls, I have recently (almost) made a set of steps in the garden.  The need for these steps came from the desire to ensure that the house was never troubled again by the dampness caused by rising ground.  The photo (left) shows the garden as it was, with high ground and the old extension; the new steps are where the scruffy elder was growing, and go down about a foot below the old ground level. We took away the raised earth from beside the house last September (see this entry), and made a sort of lane beside the house with a two to three foot high earth bank.  A retaining wall is being built to keep the earth bank away from the house, and so the steps are needed to reach the higher plateau of what will be a lawn (in due course...).

These steps (right) have been made to last, using Thermalite blocks on a concrete foundation, and concrete slabs as the steps and risers.  The annoying thing here was that I tried to make 6.5 inch steps and the first one came out at 7.5 inches; I tried to correct this on the upper two steps and they still came out at 7.5 inches! Hence the top step, when done, might either have a smaller riser, or else I will be moving soil around to get a decent level at the top.  The blocks are easily cut using a sacrificial saw - I used one left by my builder last October.  However, I had another issue with cutting the concrete paving slabs.  They are REALLY tough, and I now reckon my design is over-engineered as I have taken the trouble to make sure that the slabs are properly supported, but now I don't think that I needed to bother as they are so strong. I've only tried a few cuts and found that my new grinding disc is already completely knackered.  So now my technique is to simply score them with the grinder on both sides, and then split them using a lump hammer and my 3 inch bolster - result!

The sides of the steps (and the rest of the retaining wall) will be faced with small bits of limestone to mimic a dry stone wall, except that the back of the stones will actually be set in mortar - probably NHL3.5.  I then hope to grow plants to trail down the wall from the top, some campion at the bottom and, perhaps, something actually growing in the wall itself to give that effect of a lovely Devon lane.  It's just a personal memory of childhood holidays there...

Wednesday 8 August 2012

Front Lawn and Driveway

After all that's been done on this house in less than two years, you wouldn't think that I could have a problem over something as simple as cutting the grass.  The problem is storage - there is nowhere to keep a lawnmower, so until there is I don't want to buy one.  I used to have a sickle (inherited with the property) which kept things under control last year but somewhere this has been lost; I think I hid it so that my grandson could not hurt himself (or us!) with it, and now I cannot find it.  This was useful at keeping the weeds down, but is a bit labour intensive really.  Slowly this year the grass has grown to represent a moderate hay crop in some places; since the lawn I seeded in March has grown wonderfully, I'm puzzled as to why the old lawn has grown so slowly. 

Anyway, the solution was quite simple in the end - I borrowed my son's mower! This seems a small payment for the babysitting that I do (even though I do enjoy looking after my grandson).  His lawn is less than half the size of mine, so the mower had a good workout.

Of course, having done that task and made it look very nice indeed, only a day later Colin, my friendly groundworker, came and drove his digger over it.  Reason? At last my neighbour is having his driveway done, so very soon he will be able to enter the front garden through his own gateway and park on his own drive for the first time. On the right is a shot of the work in progress, with the mown lawn being abused and the first pile of three being prepared for the grab lorry.

The photo below shows the almost finished task, which has a lot more driveway than mine.  The old gap in the wall is on the left; I had my eye on the stone from the new gap but sadly his part of the front wall had been rebuilt at some time in the recent past using C*M*NT mortar, so it took a pneumatic drill to prise it all apart.  [I'm sorry that I just cannot bring myself to spell the C-word with regard to its use on period property.]  The result is that many of the stones are broken and unusable.  In comparison, my bit of wall came apart very easily last year - see this previous entry.  I'm not sure that it had any mortar at all apart from some recent c*m*nt pointing which was not very deep (or useful, of course).

There was a small problem yesterday when one of Colin's workers pierced the neighbour's water supply with the pneumatic drill - I think Colin was quite embarrassed by that! Fortunately it was on the right side of the meter only 18" away, and a groundworker has all the necessary bits and knowledge to fix that very quickly; no harm done.

Monday 16 July 2012

Limestone Walling for Beginners

The wall beside the front gates progresses slowly.  This is not really because of the poor weather, as I have done a lot of work on it in this last week by second guessing the weather forecast.  The lack of speed is simply because building a proper stone wall is a laborious task which cannot easily be done more quickly, especially by an amateur such as me.  The new wall is hidden behind this fence panel (photo right) to the left of the front door, and extends to the boundary wall on the extreme left.

Before finalizing the design of this wall I did a fair bit of research to see what sorts of wall could be described as the local style.  Although this was interesting, I actually got confused as there were so many slightly different styles which I had never noticed until I took fifty pictures of various local walls!  I therefore settled on the obvious idea of making it the same design as the boundary wall that it meets, although I am adding on the top some coping stone which was removed from the front wall where I put in the driveway (see photo at the bottom).  The end of the wall has to be 17" wide as that is the width of the reclaimed cut stones with pintles for gate hinges (which I bought last year), and the lower one can be seen in place in the photo left.  As the coping stones which I have are 14" wide, the wall will have to narrow slightly both as it rises and as it goes further away from the hinge line. It also has a slight bend in it, which is why the courses look odd in the photo left (NB It is about 27" high here and still needs pointing).  The finished wall will be about 6 ft high at the end for the gate hinges (i.e. the left hand end in the photo), and about 8 ft long, so that I will have a pair of gates beside the front door, and then the wall will extend across to the external garden wall.  The soil rises as you get closer to the garden wall, so the height above ground will be only about 4 ft at that end; to aid security, I will plant blackberries which are growing freely here - they are really nasty so will be quite an effective deterrent.

I am using a 3:1 mix of sharp sand and Castle NHL5 plus a small amount of building sand for the mortar of the main structure; possibly I could have used NHL3.5, but I wasn't sure so went for the "eminently hydraulic" NHL5 (see the Mike Wye website for explanations!).  For pointing I shall use a 3:1 mix which I have already tested and made up, using local sharp sand and lime putty as this will give me a good match with colour seen locally.  I think I read somewhere that it helps a wall if the outermost mortar is more porous than the internal mortar.

Technically I am repairing the wall, as I found the old foundations of a brick wall whilst digging the foundations for this one.  I am embarrassed to admit that the foundation is comprised of concrete blocks as I want this wall to be solid and to outlast me.  I know that lots of old walls stay standing for umpteen years but I bet that the people who put those up had a lot more skill than me! 

It might not be obvious but it is essential that limestone is laid in the correct orientation: the strata in the stone must be horizontal, as this is how the sedimentary stone was formed; if you lay it on its side then the strength is reduced significantly and it might well split.  It helps a lot if you can lay each course using stones of a uniform thickness, and you should also try to use the thicker stones at the bottom of the wall (but that might just be to save lifting heavy stones up high!).  The shape of the stone is clearly important as well; I am building a wall of squared faced limestone by re-using old stones which are already essentially in the shape of blocks.  You can do a wall using rubble, which sounds terrible but means that the blocks are not squared and you probably have to use the natural face caused when the stone is split.  Even then, you still want to build it in courses, but they can go up and down gently with a varying thickness, rather than being in neat horizontal lines.

I am trying to make the wall look as though it has been there for ages by using weathered stone which looks grey rather than yellow, and the source of a lot of this was the driveway cut through a low wall (the right hand gap in the photo, right).  However, that only gave about 20 sq ft of stone, and I probably need 50-60 sq ft.  I have also got some various bits of stone which were lying around this property, plus some yellow stone from under the kitchen floor, plus some more grey bits found when digging the foundations for the extension.  More recently I had some good fortune when the digging of a soakaway in the churchyard two weeks ago yielded another 5 sq ft of lovely squared blocks which have dried out and look very good.  [Top tip: sodden limestone and bricks dry out very well if you remove all the earth and mortar, leave them outside (raised off the ground on some old batten) and brush it periodically with a stiff hand brush.]

One obvious reason for the poor rate of completion is that my own skills are limited - after all, like many other tasks on this house, I have never done this before.  Although I have a good idea of how it should be done, there is no substitute for experience.  Another reason is that the supply of stone is limited (and the stone has been spread over a good area of the intended lawn), which means that the choice of each stone is quite time-consuming, but pre-sorting the stone by thickness helps speed things up.  I try to choose all the stones for several feet of a single course before mortaring them all in as that seems to speed things up as well.  I do actually find the job quite satisfying; this is possibly due to my mathematical bent and my liking for jigsaws.  I also used to play Tetris and am good at packing the car for going camping.

My final reason for the slow progress is that it is very tiring work.  My elbows feel strained and I have been sleeping very well recently.  Hopefully I can make more progress in the next week or two, and I'll post details when I unveil the wall to the public!

Tuesday 10 July 2012

Walls, Weather and the Olympic Torch

Since I last posted more than two weeks ago, I really have been trying to stop getting annoyed with the weather and just get on with the various walls which I need to build.  However, I have to report, just in case it's not obvious or you're lucky enough to not have been in the UK recently, that progress on walls has been frustratingly slow because since then I've only done about three days work thanks to our "summer".

One achievement is that I have done a good bit of work on the second wall end in the front gateway of the driveway.  This was an essential precursor to doing the main wall beside the house as it needed to have first choice of the available stone in order to match the rest of the wall.  It isn't finished or perfect but I am quite satisfied with it.  Its public position means that it gets more attention than I might like and it will still need more work such as setting the coping stone.  The weather has been so bad that I've not even taken a photo yet, but will do so soon.

Such is the rarity of decent weather that I recently had to choose between using a fine day to maximum benefit by doing more walling or going and see the Olympic torch which passed nearby.  In fact, we were living in London not far from Tower Bridge when the Olympics were "won" in 2005 and we decided then that it would be a good idea to have moved out of London before the event happened.  Somehow one knows that the public disruption will be quite intolerable for those residents who have a reasonable desire to actually work almost as normal.  You won't be surprised that such is my level of enthusiasm for the Olympics that the wall won and I spent a productive and tiring afternoon doing half a course of the wall beside the front door.   

OK, yes the Olympic torch passing is a once in a lifetime event, but there are many other things I wish that I had done in my life, and I have learned to have few regrets.  One thing that I do still regret was when Concorde was returned to service (in 2002 I think) after the Paris accident; passenger numbers were low so they were offering a day trip to New York (with one way on Concorde) for £1,000 but, even though I could have afforded it, I persuaded myself that there would be other opportunities.  Of course, when they suddenly pulled the plug less than two years later, there were no good deals then!

Finally, I should record the first anniversary of our actual move into this property.  This causes me firstly to ask where the year has actually gone?  There still seems so much to do and, as far as I am concerned, relatively little seems to have been accomplished of what I expected to do (but when I say this, Jane says that I shouldn't be so hard on myself).  I know I can't blame it all on the weather.  Once you are actually living in your house, the priorities all change and I have deliberately told myself that I am retired so what is the hurry?  I still refuse to have a huge list of tasks as that would be too depressing, but I do try to decide at the start of each week exactly what I'd like to achieve in that week; however, that brings me back to the vagaries of the current weather...

Sunday 24 June 2012

Walls and Weather

Well, I could go on about the recent weather, but you know what it's been like.  What I find really annoying is when the forecast is for weather which is a lot worse than the actual.  This can really mess up one's plans for the day, when you want to work outside, using cement or lime.  You find the day is unexpectedly sunny when frequent heavy showers are promised; yet when you check the current forecast on the BBC for your own specific local area, you find that it's still showing heavy showers.  So what will happen in the next couple of hours? Do you dare risk it?  I think that they are covering themselves with that symbol of a black cloud with raindrops and sunshine; basically they haven't a clue!

I have managed to out-guess the forecasters a couple of times.  I have started the garden wall foundation (parallel to the western wall of the house, about six feet away, holding back the higher ground) and have done the foundation and the first real bit of wall on the wall beside the front door.  There's also a new bit of concrete where the wheelie-bins will be stored.  Sadly, this is now the height of summer and I have barely started the major outside jobs that I had been "looking forward" to doing; apart from the walls and concrete leading to the patio area, there are a large number of sash windows which need refurbishment while it's warm (if/when?).

I've also done the promised run to the scrap merchant; the brass was £2/kilo (not bad...) but the ferrous stuff was down to 11 pence/kilo which was a bit disappointing considering I took 246 kilos in my car!  When he weighed it, the scale said 445 kg which almost excited me, but that weight was because it had all been put in a large (and heavy) metal stillage.  At least there is now a bit more room in the garden as I've also done a run to the council tip this week.

I mentioned (here) about the limecrete floor being laid in the church opposite; here's a photo of the finished floor.  This is just the choir vestry, where there was extensive damp, rotten floor joists and horrible smell!  The stone is Creeton Silver edged with Creeton Blue limestone (from Ancaster, I think).  Before you ask, no, I don't know why honey coloured stone is called "silver".  There's now a French drain and new soakaway being done outside in the churchyard, as well as re-pointing and leadwork.

It's all expensive but it's the necessary long-term solution to ensure the structural integrity of a Grade I listed building which will still be here long after I've gone. Once again, I'm reminded of the proverb "a stitch in time saves nine".  This is so true of old buildings - if you don't look after them properly then one day you (or your successors) will have to repair the unnecessary damage and pay out many times what you saved in skimpy maintenance.

Friday 15 June 2012

Reclamation and Recycling

Whilst contractors were working here, I always tried to keep the place tidy.  Now, with some contractors this was impossible (see this entry, for instance, or this one), but in general I managed it. At times it almost got too much for me, especially with the way that most contractors just throw the rubbish down without thinking about it.  I used to pick up nails and screws on the scaffolding and I was delighted to supply a hundred copper nails once to keep work going when the roofer ran out!

Simply separating rubbish and scrap made a huge difference to the general tidiness, and made it much easier when I went to the scrap merchant.  These visits have made me a bit over £350, most of it from lead, but there is also a good satisfaction at everything which does not go to landfill or free to the council tip. A lot of old wood was burnt outside, and then more was used on the woodburner in the winter; a pile of old (untreated) rafters and batten still awaits a similar fate next winter, together with the remains of the trees from the front garden.

One particular thing that got recycled were the 10 litre tubs for the lime mortar and plaster we used for the plastering.  I had to get all this in tubs - we couldn't even get the 950kg pallet of 45 tubs onto the pavement so it had to be left in the road; then they all had to be moved inside by hand without delay. (I once had a much cheaper 950kg bulk bag and almost broke my back putting that into tubs just to get it inside...)  Given that I probably had 13 or 14 deliveries from Mike Wye, you can see that I had well over 500 tubs plus lids; these tubs can be quite useful, but if you're not careful you end up with dozens of tubs filled with hardcore or rubbish to be taken to the tip.  I did manage to send a couple of pallet loads (see left) back to Mike Wye for a small rebate but that really was hard work for little reward.  Consequently, when we moved in, I got a recycling bin and started putting 15 tubs and lids in each fortnight!  Long job, but we're there now.

During this project I have found a great deal of satisfaction in re-using items, and the list is now quite long.  The first thing was a bit of 3"x2" oak ceiling joist which I cut out to make the loft hatchway; within 30 minutes this had been re-used as a replacement for a section of the adjacent wall plate which had rotted (due to the prolonged roof leak).

I did numerous repairs to the structure of the house, using (as appropriate) old bricks and stone found around the place.  In particular, some of the stone which I used to fill the old kitchen doorway (under the window, photo right) was found just inside under the old kitchen floor where it had been the foundation for an internal wall.

Although I replaced the old 2.5" cast iron downpipes with 3" (to match the wider 5" gutters which I considered necessary), I was able to re-use two sections of the 2.5" for places where it didn't join to the guttering, one for the bathroom outlet (where the old piece was cracked lengthwise) and the other on the extension.  Both were wire-brushed and painted copiously with Hammerite.

The LBC said that I had to re-use the old door furniture on the new front door, but apart from the (original?) doctor's knocker, that was not feasible - the knobs were from internal doors and the 4" letter plate was far too narrow for modern use. 

The new extension has several re-used items.  Most significantly Jane and I reclaimed 1800 bricks from the demolition rubble (and only had to buy about 200 more to match), whilst the chimney is topped with a yellow pot from the original back chimney (this chimney pot spent a year acting as the kitchen rubbish bin!). The old internal ledged and braced door to the utility has been refitted at the other end of a new wall in the same position, with the original Suffolk latch fitted, and the redundant external ledged and braced door is also repaired and repainted, ready to be fitted to a pair of pintles on limestone blocks which I bought at the local reclamation yard.  This will be one of the pair of back gates; the other matching door/gate was obtained as a swap for some old glass (thanks JohnB) and is already fitted.  Also, as I have mentioned before, the casement window in the extension was a major repair which I did myself, utilizing part of the frame of the replaced front sash window, plus some old wavy glass from two broken sash windows.

Of course, we had to buy a lot of reclaimed Welsh slates for the roofs, but we did re-use what we could, although that was a pitifully small percentage.  Another reclamation yard purchase was the almost new sash window in the extension (on the left of the photo, left) which we bought for £95 including delivery - absolute bargain!

So, I'm now working on the garden walls, again using (free) stone from around the site, including the weathered stone from the front wall where the driveway now goes.  Next week I'll do another run to the scrap merchant with the last load of brass and iron, including the old Crittal door and windows.  Then, when I have also built the stone wall (using the stone from the front wall where the driveway was made), the garden might look a bit tidier.

Friday 8 June 2012

Rain, Rain, Rain

I asked the other week why we British always talk about the weather.  Well, after the rain of the last week I think I can now answer the question - it's because the weather is so b****y awful.  April and May were bad enough but I think we all thought that the heatwave at the end of May heralded the start of summer.  Wrong!  I have managed to get a small amount of work done outside, but nowhere near as much as I had hoped.  Right now the rain has eased but it's all muddy underfoot in my garden builder's yard and everywhere is dripping.

What I have achieved is to make a deep concrete plinth (right) on which to mount a cast iron lamp-post, and I've laid a concrete foundation for the wall beside the back gate, together with some block work where the wall itself will be buried in the slope of the garden (no point in burying good faced limestone!).  Although they seem small, these two structures together consumed a whole one tonne bag of ballast!  There is just the small matter of the wall itself to be built, plus 14 yards of foundation and retaining wall for the garden beside the house.

Mind you, I have been very busy on other things in the last ten days.  We had a church 1950's party which had to be held inside as it was so cold (quite apart from the occasional shower) and we've spent some time looking after our dear 17 month grandson.  Firstly we took him (without his parents) to a large family do in London where the sheer numbers could have fazed him, but he survived remarkably well and we returned home as proud grandparents (although we also acknowledge our age and consequent tiredness).  Then we looked after him for a whole day at our house, when he was cheerful, fun and communicative (and we got even more tired!).  He has reached a reasoning point, where he can work out a problem for himself.  For instance, he has been known to push a chair to the kitchen work top so that he can climb up onto the work top!  The other day he stood near our front door and then at me and asked to be picked up.  It then became obvious that he only wanted to be higher so that he (or I) could open the front door as he knew the latch was well out of his reach.

I have also recently received direct from the publishers a copy of a new Haynes Manual called "Period Property - care and repair of old houses".  This was especially good because it was free: it contains some photos of the limecrete floor in this house.  Then the author, Ian Rock, came to see this house as he was so interested by this blog and wanted to see what had been done to the house. [Edit - they now have a website http://www.period-house.com/]

Friday 1 June 2012

A Genuine Jersey Holiday

It has been a bit quiet here recently.  This is partly due to a general malaise on my part, partly because I have been doing odd little jobs which aren't worth reporting, and most importantly because we have just had a week's holiday in Jersey.  This was our first overseas holiday in almost four years, so it was about time!

Jersey is interesting.  Many buildings are made of granite, and they seem to care more than my local council about the old look of the place, especially away from St Helier.  In consequence, there was a lot of work being done by local builders using granite, although I suspect not with lime mortar.  Actually, since granite is (I think) not porous like limestone, I'm not even sure if lime mortar is as necessary as it is with limestone.  There was also a significant amount of concrete work in evidence, much of it dating from the German occupation in WWII.  They used slave labour to fortify the place against an Allied invasion which must have been a huge drain on their resources; however this was totally wasted as the Allies had not the slightest intention of invading the islands.  One of the still useful legacies is a high sea wall (built to prevent tanks being landed) which goes all the way along the five mile beach at the west of the island.

If you are thinking of going to Jersey (as a tourist rather than occupier!!), I advise you not to go in July or August if you want to drive around.  The roads are small, junctions have poor visibility and parking can be difficult.  I think that the roads and junctions are deliberately never improved as the maximum speed limit is 40mph (and can often be 30 or 20!) and so the road design is effectively a cheap means to regulate traffic; if you have an accident at those speeds, it is probably rare to even injure someone.  The road signs leave something to be desired; they seem to fall between UK and French standards, so often a junction is signed in advance but not at the junction itself.  The parking would have been tiresome in the peak times, but we were able to park quite easily, even in St Helier.  These things were not really a problem in May, but we kept on asking ourselves "what would this be like in August?".

Our visit occurred during the Jersey Food Festival; we spent the only really wet afternoon in a posh hotel watching and tasting cookery demonstrations (and I tasted my first oyster).  A simple food I now love is the boiled Jersey Royal potato - delicious with butter.

One place we visited was Jersey Dairy Ltd - see photo of their new factory right.  They are effectively the only exporter of dairy products from the island.  (My thanks to Eamonn the MD for the tour, the free ice-cream tasting was great!)  One little-known fact is that under current rules the Channel Islands are not protected by labelling regulations, and so if you have a single half breed Jersey cow in your herd anywhere in the UK, you can sell all your milk as "Channel Island milk" or "Jersey milk".  Apparently most supermarkets use this ploy on lots of dairy products to confuse consumers, which seems a bit underhand but is quite legal.  To avoid it you should look for a little logo which says "Genuine Jersey" (and I think there's an equivalent for Guernsey); this logo IS protected and means what it says.  The Jersey cows on the island are registered and protected in order to maintain the purity of the breed, unlike on the mainland here.

By the way, we also visited a farm: the Jersey cows are ever so sweet and friendly!

Saturday 12 May 2012

Why do the British always talk about the weather?

It's a British stereotype, isn't it?  Put a group of Brits in any social setting and the standard way to break the ice is to start a conversation about the weather.  Being British, the odds are that the conversation will not actually progress much past the weather.  If the group were French, American, Israeli or African, the odds are that you wouldn't leave until you had shared your life stories and been invited to stay should you ever pass near their home.  (I met a couple from Hawaii recently who gave me their card and said that I must drop by if I ever go to Hawaii!  Being Americans, I reckon they meant it, but I doubt that I will take them up on it.)  But we just talk about the weather.  Nice day, isn't it?  Hasn't it rained a lot recently?  Last night was a bit parky.  What's the forecast for tomorrow?

I think a lot of it is that we are just not used to sharing personal information verbally.  This seems odd, considering that most people seem to be happy to share all sorts of stuff with complete strangers on the internet (which I personally reckon is pretty unwise).  The weather is always unpredictable and seems a safe topic of conversation; when I was younger we were not allowed at family mealtimes to talk about cars, work, school, sport, religion or politics, which pretty well left the weather as the only topic!

So why am I writing about talking about the weather?  Well, I have lots of work that I'd like to do outside and haven't been able to because of the weather we've been having.  Right now I have stone walls to build, concrete and paving slabs to lay, plaster to mix (for inside) and things to sand and paint.  I can't really even tidy up the extension as most of it has to go in the shed which is on the far side of a sea of mud (which is where a lawn might be next year).  I made a start yesterday (Friday) by finishing one end of my low wall beside the drive and starting the foundations for the wall beside the front door, but there's a long way to go.

I now realise just how good the weather was last year, as I was able to take my pick of jobs according to priority, not according to the weather, and could do lots of messy jobs like sanding doors outside in the sun.  The only good side of it is that the grass seed which I sowed in hope during March has come up well - the irony is that I decided not to lay turf as I thought that the hosepipe ban would mean that it would dry up...

Tuesday 8 May 2012

Another Limecrete Floor

A slight diversion from our house, to the church across the road where they are in the process of laying a limecrete floor in part the church.  This is noteworthy as all too often ignorance wins and a concrete slab gets laid, or the flagstones are sealed (so why bother with a breathable floor underneath?). I found a year ago that there was very little detailed guidance on-line when researching the design of our limecrete floor, so I make no apologies for giving such detail here again.

The church architect got the design of the floor from Ty-Mawr, who are one of the main lime suppliers in this country (I used Mike Wye but there are others...).  The floor design is basically the same as the one I laid in the kitchen here (see this post last year), apart from using Recycled Foamed Glass (RFG) instead of light expanded clay aggregate (LECA).  In detail, from the bottom up, there is a geotextile membrane, 200mm of (lightly compacted) loosefill aggregate of RFG, another layer of membrane, then a 3:1 mix of RFG and NHL5 to form the slab (I think, 150mm thick).

The slab has now been laid by The Limecrete Company and looks impressive (right).  The edges have a vertical inch thick piece of woodwool, whose function I have yet to understand but it might be related to crack prevention.  There will be underfloor heating (UFH) pipes added with a 3 inch Glaster screed and 20mm Creeton limestone tiles on top, although this heating will not be connected until a new boiler is fitted in a later phase. This work is the second stage (of about four!) of renovating the church; phase 1 was electrics, lighting, sound and internal redecoration.  The next phases will also include installing toilets and a servery, and levelling the entire floor with the same sort of floor with UFH (and chairs instead of Victorian pews).

Thursday 3 May 2012

Doing Things Wrongly

I do hate doing things wrongly.  I always have [Edit - I mean "I've always hated doing things wrongly", not "I've always done things wrongly"!].  In particular, on this house I have wanted to "do it right" and, mostly, I think I have succeeded.  I'm going to live in this house for years and I hate the idea of continuously seeing something I did wrongly and thinking "I wish I'd done that better".  There have been one or two places where it's not perfect and I've persuaded myself to live with them as they "add character" (great excuse for old buildings).

Now, I've just painted something wrongly.  I've been using satin finish paint on the woodwork in the new extension and it looks very nice.  It's a cream colour which is basically the colour of the old woodwork and it sets the doors off nicely against the white of the plaster.  I've done both sides and the frame of the door from the kitchen into the extension (see previous picture) and I had done one and a half sides of the door into the utility when I ran out of paint.  So, on Tuesday at a local well-known store, I bought a second tin after some considerable searching for the right type; I returned home with my prize and continued the task, finishing off the first coat on the half finished door, and then doing a second coat on the side I'd already done as it looked a bit thin.  For good measure I did the door frame and also some touch up in a few places on another door frame.  All seemed well until I went to wash the brushes; I was sure that satin finish paint is washed in warm soapy water but, to my horror, I found that nothing happened apart from a mess of globules.  Check the tin - "clean brushes in white spirit" - so, out with the white spirit and still I didn't catch on. 

Later, I checked my work and found that it hadn't dried.  This was odd as satin finish is quite quick drying.  Looking at the door I suddenly realized.  It was still glossy.  With a sinking heart I checked the tin.  "Full Gloss." All is explained.  B****r!

I could leave the one side in gloss but I just don't like gloss paint internally; if I do leave it, then I'll forever look at it and be reminded of my own stupidity.  There seems nowhere else to go but back to the store and buy a tin of the correct stuff, and then forget that Tuesday ever happened. Apart from wasting my time and £11 for the paint, I still have the issue of whether I have any use for that paint and, if not, what do I do with it?

Sunday 22 April 2012

More Stripping and Plastering

Firstly, a quick update on my health - the expected all clear on the biopsy came, so there's no excuse now and it's back to work with a vengeance.

When we did the extension last November, we had replaced the lintel above this kitchen door as we found that the old one had rotted at one end, thanks to the poor flashing on the old extension roof.  This photo shows the door (before it was turned round) after the demolition of the old extension, and the rotten lintel is clearly visible.   This rot was a shame as the lintel was made of three bits (to give 16 inches wall thickness) of four inch pitch pine which still smelt wonderful.  This unexpected work meant that some of the plaster already done inside was removed, and then the rest of the plaster around the door became loosened when the door frame was done.  So, it was back to stripping plaster on Thursday, followed by some more lime plastering for the scratch coat on Friday.  

We have a lot of old doors in the house, most of which were covered in a sort of brown varnish which clogs sandpaper very easily.  At first I didn't like them as I thought they were probably the 1920s version of those horrible cheap panelled white things you get in all new houses and refurbishments these days.  That's probably a bit unfair as, despite the varnish, I've come to appreciate them - an example of why you should never make changes in a rush on an old house unless absolutely essential.  They have four panels with the upper pair being larger than the lower ones; most have a simple right angle recess, but in the lounge and the hall side of the kitchen door they have a bit of ogee architrave (which of course makes stripping more difficult!).  These doors are also different sizes - I discovered this last November when I thought about changing the hinge side of the kitchen to extension door, and measured them all to see if I could swap them around.  "Never assume - check" was the flight safety mantra when I was in the RAF, and it's true for old houses as well.

Since the door frame was being completely replaced, it seemed sensible to turn the door round, rather than cut new hinge recesses etc.  However, the horrible rough white-ish finish now on the kitchen side meant that I knew I would have to do some serious stripping and restoration before too long, as it just looked so bad every time you went in the kitchen.  Mind you, the side on the extension was brown paint and didn't look much better.

Anyway, just after Easter I decided that now was the time and I've done the complete thing over the last two weeks (i.e. slowly).  The old paint was ghastly and probably toxic, so when I used the heat gun and a scraper, I made sure there was plenty of ventilation.  It was possibly half a millimetre thick in places and came off as a nasty goo on the scraper which itself had to be scraped off before the next go.  After that the rest was a doddle and yesterday I applied the final coat (see photo left) which is always the best bit - it's so satisfying, as opposed to the scraping, sanding, filling, priming and undercoat which are all just boring


The result is that it all looks much better and Jane loves it, even though I have yet to finish the remaining coats of plaster. 

Wednesday 18 April 2012

Back to Work

Well, I could now give full details of what is involved in the rather personal procedure I went through last week, but I'll keep it polite.  They removed a small part of me and so I now have to wait 7-10 days for the result of the biopsy; however the doctor is quite sure that in his experience I'm OK.  The procedure actually wasn't too bad - it's quite odd seeing your own insides on a TV screen and the staff were all wonderful.  I have nothing but praise for the way I have been treated at the local NHS Trust hospitals.  The worst bit of the whole affair was the preparation for it when you twice have to swallow a solution of magnesium citrate.  If you know what that is, then you know what I mean!  Google it if you've never heard of it. Enough said.

So, back to work after my enforced rest.  The gateway to the back of our house is through a mock wrought iron gate, which is just visible in the photo (right) on the left of the doorway.  I don't like being visible to people in the street whilst I relax with a beer or cup of tea in the sunny spot at the back of the garden . So, at last, I have erected one of my back gates; this one was the one that I obtained as a swap for some wavy glass which I didn't need.  I had recently spent some time re-painting it, so it was all ready. To fit it I had to remove, refurbish and refit the existing gate post which was attached to the wall beside the front door.  The old 4 by 3 post was a bit rotten but I decided to re-use it as I didn't think it was as bad as it looked (it wasn't) and I thought that it might just be oak (it was).  I trimmed the rotten ends slightly and gave the whole thing a treatment of some proprietary chemical which is said to be good for preventing further rot.  I know this isn't very PC in the period property world but I do not want to have a bit of damp rotting wood attached to the house.

I drilled a hole in one of the quoin stones on the corner beside the door, set well back from the edge, then attached the post with a single huge coach screw.  I was then able to drill the holes in the wood for the other screws in situ, lined up with other suitable stones, so that I could drill through to mark three more holes in the chosen stones.  Then, by swinging the post on the one loosened screw, I could drill the holes in the stones, which was a bit noisy (sorry!).  Then I put the post back, attached coach screws and discovered the bad news: the old post was pretty straight and I had made the hinge line vertical as you look at it, but the thing that caught me out was that the wall wasn't vertical.  Jobs are never as easy as one would like, are they?  So, it was again loosened so that I could swing it away from the holes and fit some packers, then retighten.  I did shear one of the 140 mm coach screws but fortunately by the same method I was able to get to it and remove it with my pipe wrench, and re-tighten everything.  To my surprise the gate went on fairly well with the new T-hinges, et voila! It's even horizontal, and is so low that the local cats won't be able to get under it - if they want to use my garden as a hunting ground then they'll have to jump up and over the new wall - when it's done!  I don't have a photo of the new gate yet as it hasn't stopped raining since I did it.

I now need to do that "new" wall which is going to incorporate two lovely stones with pintles, so that I can then hang the other gate (formerly the back door, now being refurbished).  I reckon that I don't need any permission as there used to be a wall there - I found the old foundations in January - and I don't need permission to do a repair.  In any case, no-one could see that part of the gardens anyway when the enchanted forest was still there, as you can almost see from the photo (left).  This shows how it looked in January last year after (only) the roof had been done; the wall and gates will fill the gap to the left of the corner.

However, I think it might be some time before I manage that lot, as I am turning my attention back to finishing and tidying the new extension, so that it's fully useable.  We have ordered some bits of furniture and I need to buy a couple of wall units for "my own stuff".  I know they won't be big enough for everything but I desperately need somewhere to put my things out of sight without going outside to the over-crowded shed.  If you don't have an attached garage, where do you keep your tools and materials to hand?

Monday 9 April 2012

Diversions from the Project

I've been a bit diverted from the house recently, and find that when I am able to work I don't seem to have any real enthusiasm or perseverance.  Various small jobs have been done, or have been started but are still incomplete, and I've even been doing some serious tidying such as taking the old asbestos shed roof to the tip (all nicely bagged and sealed as instructed), together with a lot of glass from the metal framed windows.

The reason for my distraction has been an unexpected health issue, which arose from one of those good ideas which people have to improve the health of the population at large.  I wasn't aware of this, but when you reach 60 (as I did in February) you are then invited to participate in some screening test so that you can get an earlier (and therefore more successfully treatable) diagnosis of a particular form of cancer.  As a customarily healthy person (albeit retired), I was a bit surprised to find that I was in the 2% of subjects who have an "abnormal" result. "Abnormal" indeed.  Who are they calling abnormal?  I've spent a good deal of my life trying to appear normal - quite clearly I have failed in that - but physically I reckon I have always been boringly normal.

It transpires that only 10% of the abnormal failures actually have cancer, but such analysis requires further investigation as an out-patient.  The good thing about this is that you are fast-tracked so there's no delay.  I had the failure result on a Wednesday, was seen for assessment the following Tuesday, and was booked for the (slightly unpleasant) "further investigation" on the Thursday of the week following.  The result is either available at once (if no samples are taken) or within a week if there is a biopsy required, so that will make just over three weeks from start to finish, including Easter.  I certainly cannot complain about the NHS!

The trouble really with this haste is that it is all-consuming, and I find that I just cannot concentrate on the things I would like to be getting on with.  Mind you, the changeable weather doesn't help; I have been refurbishing a couple of ledged and braced doors which will be the new back gates and, having just started to paint the second last week, I had to bring them inside as it started to rain.  I've also tackled a few small jobs like finishing the grouting in the extension and putting up some shelves but, as I said, concentration on such things is really very difficult when you are faced with even just a 10% possibility of having something life-threatening.

At the assessment last week, the only questions where I gave an "abnormal" response were "have you lost weight recently?" and "do you get tired easily?"  The answer to both these was "yes, because I've been restoring a house!"  I think I mentioned before how last year I was able to get into a pair of RAF trousers last worn in 1992, and I've also told (here) the story of learning to stop competing with the fit 30 year olds taking slates and lead up to the roof.  As far as I am concerned, I am much fitter than I was when I started this project.

I'll mention the results of this Thursday's investigation when I get them; if I have anything of note, I expect I'll start another blog as it could then become a major preoccupation.  NB I won't be publishing any photos of the procedure...

Thursday 5 April 2012

Using my Christmas Present at last

I mentioned my Christmas present some time ago in this entry which was still in its box at that time.  A Holzspalter - a wood splitter, made in Germany. This present was included on my Christmas list as I hope to be able to supply my own wood for the woodburner and the open fire in the lounge.

It is quite heavy and has been getting in the way in the extension as it was so difficult to move in the box with one end much heavier than the other. Anyway, recently I was bored so I tried it for the first time.  Despite the weight, it is easily portable once out of the box as it has a couple of wheels which only touch the ground when you lift up the lighter end.  There's a small amount of assembly work (for which you need tools like spanners, but they provide a small Allen key). There was a slight issue with the assembly of it as the usually hyper-efficient Germans had made two mistakes - one was an incorrect machine screw (I found a spare in my grot box) and the other was that a pair of domed nuts could not be fitted as specified because the stud was too long to fit inside the dome; however, I was able to swap with a pair of stiff nuts used for the wheels as these were the same thread and the stub axle was a bit shorter.

The mains electric motor runs a hydraulic pump which sends a ram along a short track and forces the wood against a fixed splitter at the far end.  The whole thing has a very sturdy bed for the ram to slide on. Operation was quite straightforward, once you realise that the design for safety requires the simultaneous use of both hands, one on a button and the other on a lever, keeping your fingers out of harm's way.  The trick is to make sure that the splitter is against the right part of the wood - ideally it should be lined up radially where there might already be a small split.  Trying to split an inch off centre was a bit problematic until I got the idea. 

I was a bit suprised that the movement of the operating ram gently removed both manufacturer's sticky labels from where they were attached on either side of the bed.  These are the sort of thing that I, if a manufacturer, would want to ensure stayed on my products.
The results of a couple of hours work
We did a fair quantity of wood, but probably only about 40% of what I have from the old trees in the front garden.  Mind you, I know how much wood my two fires can burn, so lots is needed.  The cypress was the most difficult due to its diameter and we had to give in on some large bits, especially if there was a branch joint.  The ash was the most exciting, seeing a ten inch section of seven inch diameter wood suddenly split and both parts propelled forward by four or five feet.  I also had some buddleia, holly, elder and laurel - we couldn't work out which it was which smelled gently of lemon.  Some of my wood was cut before the front garden work last November, and was going quite hard - clearly the best time to split is when the wood is still fresh, so I ought to get on and do the rest soon.  My neighbour is going to do his driveway soon and so I have already put in a request for his wood (holly and dead yew, mostly). I'm still kicking myself for not asking for any of his old wavy glass when he had his front windows done by a certain large company - they just smashed everything and fitted brand new.  I'm not sure Conservation would be happy!

Jane's verdict: "How good to find a tool that even a woman can use". Just stand at the right end!

Sunday 1 April 2012

Spring has arrived!

One of the tasks here was to sort out the overgrown front garden.  This was essentially completed last November, when the rest of the old trees were chopped down and the roots grubbed up (see this entry), and then the new trees and hedge were planted (see this entry).  You can then, perhaps understand my joy at the arrival of spring and the sight of all four trees and all of the hedge showing a bumper crop of buds.  The cherry was the first to burst forth into flower (photo right), and the rest are following. NB The funny green on the lawn in the foreground is lawn reinforcement netting.

Last spring I observed that the different types of tree in the churchyard opposite blossomed in sequence, rather than all at the same time.  Thus, I chose to have four trees of similar types and hope that my front garden will have a similar tree in blossom to match one or more in the churchyard; it looks as though the plan is working.  For the record the trees along the front are a Sorbus Aria Lutescens (Whitebeam), a Prunus x yedoensis (Yoshino cherry) and an Amelanchier Arborea, with a hedge of Carpinus Betulus (Hornbeam) beside the front wall and a Malus Rudolph (crab apple) nearer to the house.  In fact, the planting was done on 28th November 2011, so they have only been in the ground for four months; this success is probably due to the skill of the people involved and the quality of their trees; they weren't cheap but I really do believe that if you try to save money on this sort of thing, you might just completely waste your cash by getting a result which doesn't meet your desires, so I consider the money was well spent. [Edit: As a much later correction to this, I noticed in the summer that my Sorbus was not in fact the same species as the tree in the churchyard.  My tree supplier suggests that the one in the churchyard is a Morus (Mulberry) so in fact my “expert” was not so clever after all. Grrrr….]

One other aspect of the front garden is that I was worried about what the locals would say.  I need not have worried, as I have had a considerable amount of unsolicited praise, not just from people who know me but from many random passers-by.  (I only have to work in the front for twenty minutes and I can guarantee that someone I don't know will stop and talk to me.)  Most locals are well aware of both how bad the condition of the house was and the consequent amount of  work done to get it to this standard.  One suspects that a lot of people have been observing (and wondering!) as slowly the front of the house was cleared and improved, together with the many visits by delivery lorries (30+?) and the grab lorry (9 or 10) in the last 17 months.  I think the comments I get now are partly due to their relief that I could have done far worse.  This public reaction is also quite a relief for me, as I didn't really want to annoy the long term locals by completely laying waste the garden!