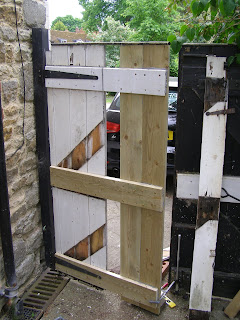
were previously doors, one from the house and the other acquired as a swap for some old glass. The latter one was always a problem as the white paint was very tough to sand and in fact was probably impervious, so kept any water in as well as out! I never painted the garden side of it for that reason, so it was black on the public side and white on our side.
Last year I saw that the black and white gate was rotting and I replaced the upper ledge in situ. Then this year I realised that the rot was worse than I thought; the new ledge was about the only decent bit of wood on the gate, with both braces and the two old ledges all looking bad. Moreover, some of the T&G was bad, especially the edge where the two gates almost meet. I haven't bothered with photos of the rotten wood - I'm sure you are familiar with that!
Feeling adventurous, I purchased some 6x1 inch treated "as-sawn" timber and, after some serious sanding, set about replacing parts of the gate in sequence. First I made two new
ledges, replacing the middle one first and then securing the two gates together (using spare wood and screws) while I replaced the bottom ledge which carried the lower hinge. Then I had to remove the first two planks from the latch side of the gate as they were narrower than the replacement board. (See top photo)
When the first plank was fitted I removed the next old one and fitted the second new one, and so on. The only real difficulty with this was that the hinge screws had penetrated through the ledge to the planks, so I had to be careful when doing the planks closest to the hinges as the gate then felt a little wobbly with these screws removed.
The other necessary trick was to work out where the hinge screws would go and, of course, one of them was right into a join between two new planks.
The penultimate plank required me to rip a narrower plank to
allow the last plank to be full size with two good edges. Then I cut two new braces which were added after the third photo on the right.
Anyway, it's finished now, complete with four coats of primer/undercoat/top coat and I'm very pleased with it!
Havng used treated timber I don't expect to have to do much maintenance to it, other than clean the bird muck off it - I'm wondering whether bird spikes on top would look silly or OK?


No comments:
Post a Comment